Top Sod Installation Tips for Broward Homeowners
- Glen Ebright
- Nov 21, 2025
- 4 min read
Installing sod can transform your Broward home’s landscape, providing a lush, green lawn that enhances curb appeal and creates a welcoming outdoor space. However, the process can be daunting if you're not familiar with the steps involved. This guide will provide you with essential tips to ensure your sod installation is successful, resulting in a beautiful lawn that thrives in the Florida climate.

Understanding the Benefits of Sod
Before diving into the installation process, it's important to understand why sod is a popular choice among homeowners. Here are some key benefits:
Instant Gratification: Unlike seeding, which can take weeks to establish, sod provides an immediate green lawn.
Weed Control: A thick layer of sod can help prevent weeds from taking root, reducing the need for herbicides.
Soil Erosion Prevention: Sod helps stabilize the soil, preventing erosion during heavy rains, which are common in Broward.
Improved Aesthetics: A well-maintained sod lawn enhances the overall appearance of your home.
Choosing the Right Type of Sod
Selecting the right type of sod is crucial for a successful installation. In Broward, the most common types of sod include:
Bermudagrass: Known for its durability and heat tolerance, Bermudagrass is ideal for sunny areas and high foot traffic.
Zoysiagrass: This variety is drought-resistant and thrives in both sun and shade, making it versatile for various lawn conditions.
St. Augustinegrass: A popular choice for its lush appearance, St. Augustinegrass grows well in warm climates but requires more maintenance.
Consider your lawn's sun exposure, foot traffic, and maintenance preferences when choosing the right sod type.
Preparing Your Lawn for Sod Installation
Preparation is key to a successful sod installation. Follow these steps to ensure your lawn is ready:
Clear the Area
Remove any existing grass, weeds, or debris from the installation area. You can use a sod cutter or a shovel for this task. Make sure to clear the area of rocks, sticks, and other obstacles.
Test the Soil
Conduct a soil test to determine its pH and nutrient levels. This will help you understand if you need to amend the soil before laying sod. Ideally, the pH should be between 6.0 and 7.0 for optimal grass growth.
Amend the Soil
Based on your soil test results, you may need to add organic matter, such as compost, to improve soil quality. This will provide essential nutrients for your new sod.
Level the Ground
Use a rake to level the ground, filling in any low spots and removing high spots. A smooth, even surface will help your sod establish more quickly.
Installing the Sod
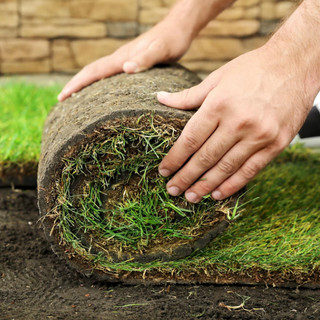
Once your lawn is prepared, it’s time to install the sod. Follow these steps for a successful installation:
Lay the First Row
Start by laying the first row of sod along a straight edge, such as a sidewalk or driveway. This will serve as your guide for the rest of the installation.
Stagger the Joints
As you lay each subsequent row, stagger the joints to avoid creating seams. This will help the sod establish better and create a more natural look.
Fit the Pieces Together
Press the edges of each sod piece together without overlapping. This will help prevent gaps that can lead to weed growth.
Water Immediately
After laying the sod, water it thoroughly to help it settle into the soil. Aim for about 1 inch of water to ensure the roots make contact with the soil.
Caring for Your New Sod
Proper care is essential for your new sod to thrive. Here are some tips for maintaining your lawn:
Watering Schedule
In the first two weeks after installation, water your sod daily to keep the soil moist. After that, you can reduce watering to every other day. Once established, your lawn will need about 1 inch of water per week.
Mowing
Wait until your sod has grown at least 3 inches tall before mowing. This will encourage deeper root growth. When you do mow, avoid cutting more than one-third of the grass height at a time.
Fertilizing
Apply a starter fertilizer about four to six weeks after installation. This will provide the necessary nutrients for your sod to establish strong roots.
Weed Control
Keep an eye out for weeds and remove them by hand or with a hoe. Avoid using herbicides until your sod is well established, usually after about 6-8 weeks.
Common Mistakes to Avoid
Even with the best intentions, mistakes can happen during sod installation. Here are some common pitfalls to avoid:
Skipping Soil Preparation: Failing to prepare the soil can lead to poor sod establishment. Always take the time to clear, test, and amend your soil.
Overwatering: While it's important to keep sod moist, overwatering can lead to root rot. Monitor your watering schedule closely.
Ignoring Sunlight Requirements: Make sure to choose a sod type that matches the sunlight conditions of your lawn. Some grasses thrive in full sun, while others prefer shade.
Neglecting Maintenance: New sod requires consistent care. Set a schedule for watering, mowing, and fertilizing to ensure your lawn stays healthy.
Conclusion
Installing sod can be a rewarding project that enhances your Broward home’s landscape. By following these tips, you can ensure a successful installation and create a beautiful lawn that you can enjoy for years to come. Remember to choose the right type of sod, prepare your soil properly, and maintain your lawn with care. With the right approach, your new sod will thrive in the sunny Florida climate, providing a lush, green oasis for your family and friends.
Now that you're equipped with the knowledge to install sod successfully, it's time to get started on transforming your outdoor space!


Comments